
Designed by Sue Stover
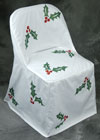
This chair cover fits over a typical metal folding chair. The canvas cover can be found through catalog companies or in fabric and craft stores. Also available are covers to go over certain styles of dining chairs. In doing this project, I found that you could stop painting at various points for several different versions of the pattern. If you are doing a whole set of chair covers, you might consider this for a variety of coordinating patterns.


Shopping list:
- Textile Colors#106 True Red
- Lumiere & Neopaque #572 Pearlescent Emerald & #566 Metallic Russet
- 1 1/2" masking tape
- 3/4" masking tape
- Sponge brush
- Paint brush
- Empty jar for mixing color
- Auto fade pen
- Large trash bag
- Cardstock or manila folder to cut stencil from
Let's get started!



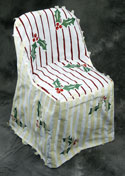
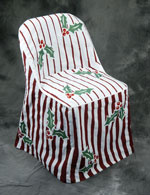
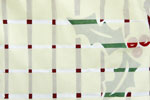
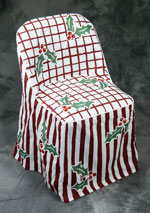


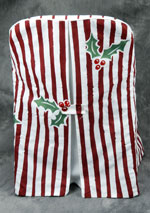
- Iron the chair cover and place on chair. To protect the chair put a large trash bag over the chair underneath the cover.
- Cut the leaves out of the cardstock or manila folder. Use an auto fade pen to trace around the leaves placing your pattern all over the chair.
- Using the Lumiere Pearlescent Emerald for the holly leaves and the Textile Colors True Red for the berries, paint in your design.
- You can leave the chair just like this by jumping to step 14 and setting the paint, or go on to step 5.
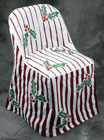
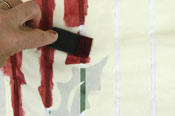
- With the 1 1/2" wide masking tape, lay down vertical stripes on the chair seat and seat back leaving about 1/4" between the tape lines. Don't worry about making it absolutely perfect. The little irregularities will give it some character.
- In the empty jar, pour the remaining True Red and the full bottle of Lumiere Metallic Russet. Stir well. This will be the color you use for all of the stripes on the chair.
- With a sponge brush, paint the red paint mixture along the tape lines. Be sure to leave about a 1/4" space between your stripe and the holly and not paint over the holly.
- When the paint is dry, pull off the masking tape.
- You can leave the chair just like this by jumping to step 14 and setting the paint, or go on to step 10.
- With the 3/4" masking tape, lay out vertical stripes around the rest of the chair. This will take a little time. Leave about 3/4" to 1" between the tape lines.
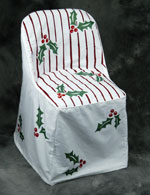
- Paint the stripes as before. Let dry and remove tape. You can leave the chair just like this by jumping to step 14 and setting the paint, or go on to step 12.
- For the checks on seat and seat back, again use the 1 1/2"
masking tape to make stripes about 1/4" wide. You will have to be
a little creative where the seat and the back come together. Start laying the tape from the front of the seat to the back and on the seat back, from the top down. If you follow the cut fabric pattern of the chair it will be a little easier - Paint the stripes as before. Let dry and remove tape.
- After painting is completed, heatset the chair cover as directed on the bottle or by putting in a clothes dryer on high for 35 to 45 minutes.


